Proofpoint – Setting filter exceptions for domains
If you’re receiving the Proofpoint email filtering service from us (or maybe from elsewhere) this will add an additional layer of security on all emails to and from your domain. There may be times when you run into issues where a specific domain you’re trying to email with has a misconfiguration on their end which can cause Proofpoint to automatically filter those messages out and those must be manually released for you to see them. This is normal as a properly configured DMARC, DKIM and SPF record should properly authenticate a domain for sending/receiving and improperly configured records on the recipients end will appear as if there is something suspicious is going on.
With that said this can understandibly become a nuisance as it requires the person you’re trying to interact with, to fix something they may not fully understand. If you’re confident that the person you’re trying to communicate with is who they say they are you can create an exception in Proofpoint to effectively disable the filtering. It should be noted that using an exception like this is tantamount to poking a hole in your security system, and could potentially lead to receiving unwanted and/or malicious email.
Follow the instructions below to create an exception in Proofpoint and allow specific domains to bypass the filter – please note that you must be an Organization Admin inside Proofpoint to follow these steps.
- Log in to the Proofpoint web console
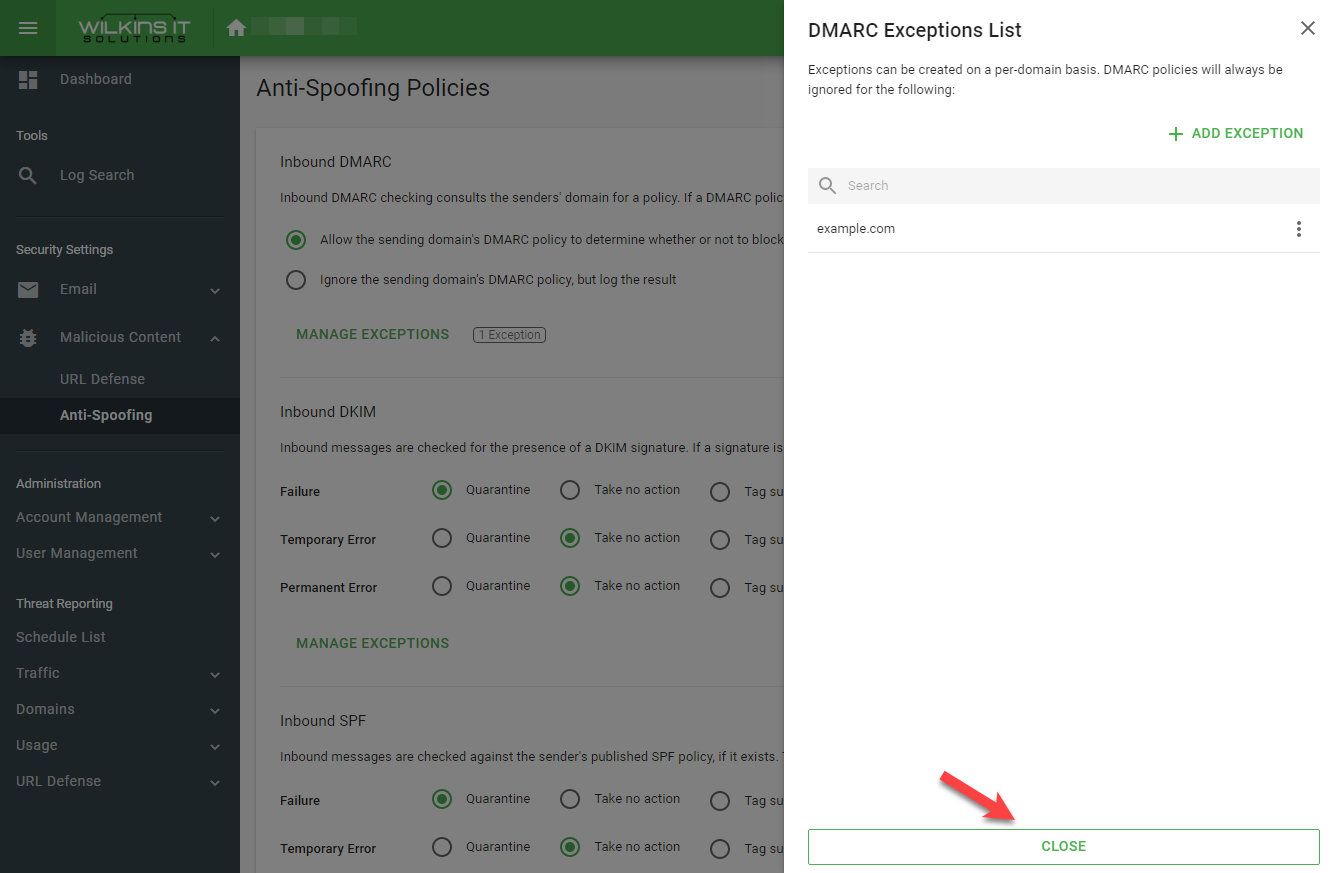
- Navigate to Malicious Content > Anti-Spoofing
- Under each of the types of policies you can click on Manage Exceptions, then click Add Exception, enter the domain and click Close
- Repeat the process for each of the policies if you want to have an exception for each
- When you’re done click on the Save button to update the policy exceptions
The above steps will exclude the domain from specific types of policy failures. If you want to also exclude the domain from any standard kinds of filtering then follow the steps below here:
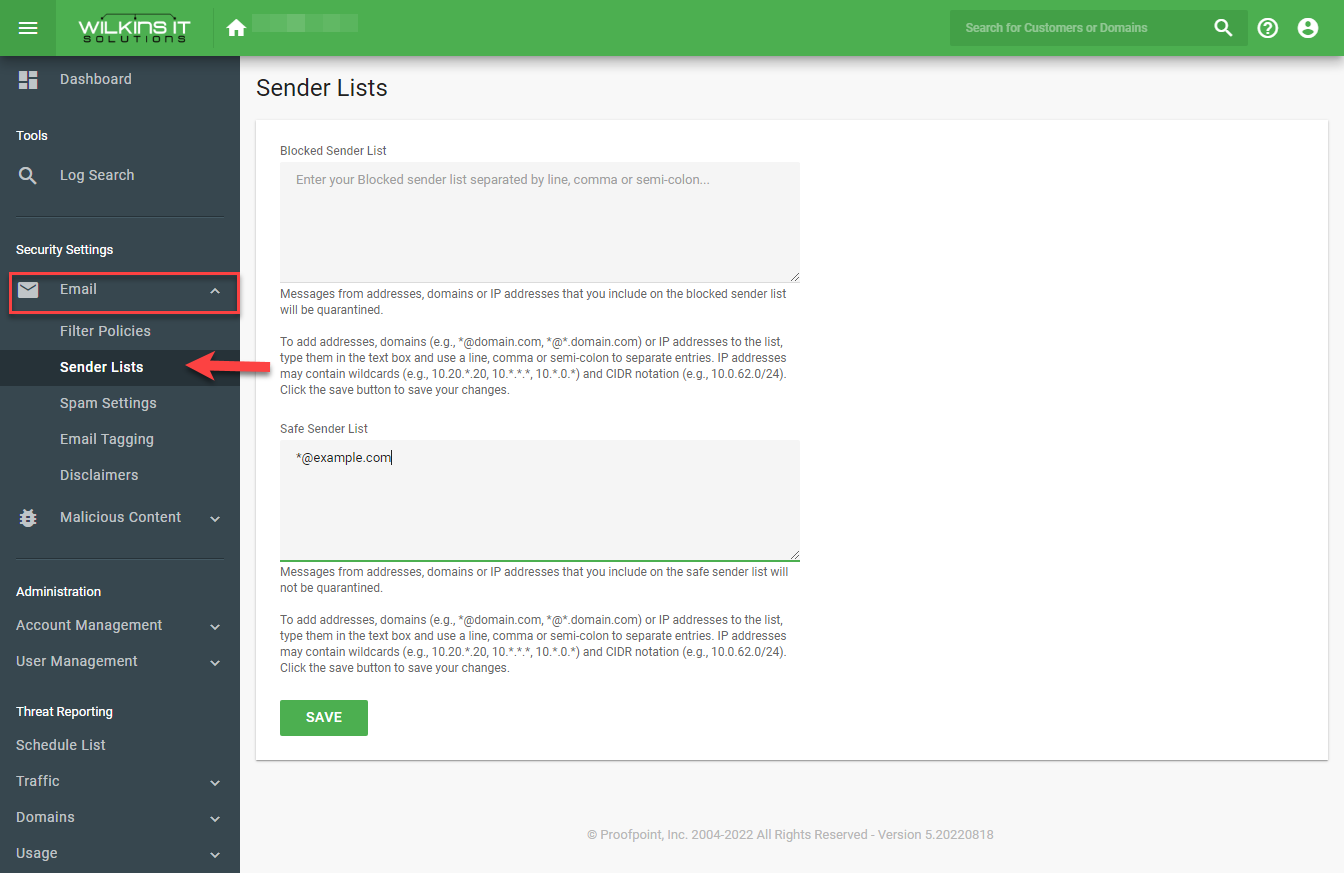
- Navigate to Email > Sender Lists
- Under the Safe Sender List field, enter either the individual email address to create an exception for, or you can enter a wildcard to include all addresses under a domain (or subdomain). For example to add the domain example.com to the safe sender list you would enter the following:
*@example.com
- You can add multiple addresses/domains by separating them with a comma. Once you’re done entering them click on the Save button to apply the changes
If for some reason after following the steps from both sections above, you’re still finding some messages are being filtered out from the specific domain then you can try creating a filter policy using the steps below:
- Navigate to Email > Filter Policies
- Under the Inbound tab click the New Filter button
- Name the filter and click Continue
- Under the Scope field set the scope the filter will apply to (company wide or to an individual only)
- Under the If field select Sender Address and the field beside to IS
- In the larger field below Sender Address and IS, enter the email address and/or domain. Multiple addresses/domains should be separated by a comma. For example to match the domains example.com and example.ca you would enter:
*@example.com,*@example.ca
- Under the Do field set it to Allow and then click on Save to apply the new filter policy
- If you ever need to remove it you can manage whether the filter is enabled or delete it outright by returning to Email > Filter Policies in the Proofpoint web console

Adding policy exceptions – 01

Adding policy exceptions – 02

Adding policy exceptions – 03

Adding policy exceptions – 04
Adding policy exceptions – 05

Adding policy exceptions – 06
Adding to the Safe Senders List

Creating a Filter Policy – 01

Creating a Filter Policy – 02
Did we miss something?
or do you want to suggest an article?
