Table of Contents
Our Wilkins IT theme includes a visual builder feature which allows you to place and edit elements on the page in real-time, this enables you to quickly put a page together and know what it will look like as you build it. This is generally the easiest way to build or edit a page. This section will guide you through using the visual builder to add and set up a Slider module.
We’ll start from when you’ve begun creating a new post (or page). In some cases the Wilkins IT Builder won’t be the default editor for a new page, if that’s the case you’ll see a button that says “Use the Wilkins IT Builder” when you’ve started creating a new page which you can click on. Once you’ve clicked it the interface will change slightly and you should see another button that says “Use the Visual Builder” which you should click on.
This will load the visual builder for you and if it’s a new post you’ll see a mostly blank page ready to be edited.
(We’ll be assuming you’re starting a new page so if you’re editing existing content some of these steps can be excluded)

Now that we’re in the visual builder, if you’re creating a new page you’ll first need to create the Row which will contain the Slider module (and can contain other modules as well). Click the green plus button that appears when you move your cursor over the main area, then choose the size of the row you’d like to use. For this example we’re using a standard one column layout.
Note: If you prefer you can add what’s called a Fullwidth Row, these rows span the entire width of the page and can only be populated by specific fullwidth modules. If you’re adding a Fullwidth Row you must click the blue coloured plus button to add a Fullwidth Row in the visual builder, otherwise all the following steps should be very similar.

Next move your cursor inside the new row section you added and click the gray plus button to add a module. You can search for the module you’d like to add or browse through all of the available modules. Find the Slider module and click on it.


The Slider Settings pane will open and allow you to configure the Slider module however you’d like. Sliders work by adding individual slides within the module itself, under the Content section click the gray plus button to add a new slide.

After you’ve finished configuring the slide to your preferences, click the green check mark button in the bottom right of the Slide Settings pane. This will return you to the Slider Settings pane. Add however many slides you’d like by repeating the above process. If you need to remove a slide click the trash icon button to the right of the slide’s name, if you need to make a change to an existing slide you can click the gear icon button to do so.

When you’re done making changes you can click the green check mark button in the bottom right of the Slider Settings pane to save those changes in the slider. You should see the slider on the site looking as it would on the website. If you want to make further changes to it, hover your cursor over top of it then click the gear icon button in the gray box that appears within that section and that will re-open the Slider Settings for further editing.

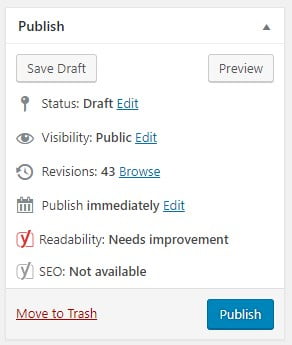
When you’ve finished adding the Slider and configuring it click the purple button along the bottom of the page with the ellipsis in it, then click either Save Draft or Publish or if the page is already published it will say Save.


(example showing a non-published page)
We’ll start from when you’ve begun creating a new post (or page). In some cases the Wilkins IT Builder won’t be the default editor for a new page, if that’s the case you’ll see a button that says “Use the Wilkins IT Builder” when you’ve started creating a new page which you can click on. You’ll know you’re using the standard builder if you see two buttons near the top for “Use Default Editor” and “Use Visual Builder“. In the standard builder everything is broken into sections and rows while modules go inside rows.
(We’ll be assuming you’re starting a new page so if you’re editing existing content some of these steps can be excluded)

Note: If you prefer you can add what’s called a Fullwidth Row, these rows span the entire width of the page and can only be populated by specific fullwidth modules. If you’re adding a Fullwidth Row you can click Fullwidth Section which is beside Standard Section located just under the blue Section module. Aside from the visual difference the steps are very similar to configuring a standard Slider module.
Click + Insert Column(s) to add a new column – for this example we’re using the standard single column. After you’ve selected a column layout click on + Insert Module(s) to bring up the add module pane. Locate the Slider module (they’re in alphabetical order) and click on it to view the Slider Module Settings pane.

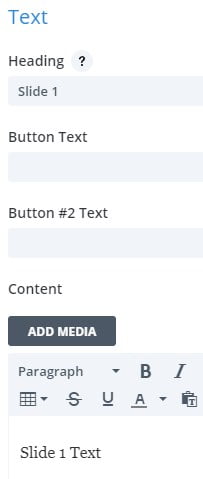
The Slider module is made up of individual slides, to create a new slide click the + Add New Slide button at the top of the Slider Module Settings pane. This will open up the individual Slide Settings pane. Configure the Slide to your preferences and when you’re done click the Save button along the bottom of the settings pane. Repeat the process to add more slides to the Slider if you need. If you need to edit an existing slide click the 3 horizontal lines button for the individual slide, to delete an extra slide just click the X button to the right of the slide name.
Note: There is a preview option you can use to get a quick look at what the Slider will look like. From the Slider Module Settings pane click the eye icon button along the bottom of the pane in the middle. To exit the preview click the X button in the same location.

When you’ve finished configuring the Slider Module to your preferences, click Save along the bottom of the pane. If you’ve finished editing the page you can locate the Publish section on the right hand side of the page and click either Save Draft, Publish or Update (if the post is already published), or if you just want to see how it will look click Preview Changes which will load an unpublished copy of the page for you to review.