If your organization uses public folders for shared Calendars, you can use this article to help you set up your Office 365 account to access those items. There are two different methods, use whichever depending on whether you use the Outlook desktop app or Outlook on the web.
Table of Contents
Outlook Desktop Application
First, with the Outlook desktop app opened click the ellipsis icon (the three dots) beside the Tasks button and then click on Folders (hotkey: Ctrl+6).

In the folders pane look for the category that begins with “Public Folders – “. You may have to scroll down a bit to locate it. Once you’ve found it expand it by double clicking on it’s name, then expand All Public Folders by double-clicking it as well.
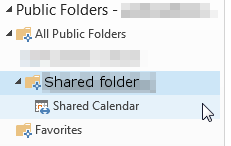
There should be a shared folder visible now, it’s name is should include something to indicate it is a shared folder. Open this shared folder and inside should be the shared calendar you’re looking for. Right-click on the calendar and click Add to Favorites… if you’re prompted to set a name for the calendar you can name it whatever helps you identify it best.

Once you’ve added the calendar to your favorites, navigate to the Calendar pane by clicking the calendar icon or using the hotkey (Ctrl+2). The shared calendar should now appear under “Other Calendars” in the list for you to access, make sure to check the box beside it’s name and make sure you’re able to view it properly.

That’s everything, once you’ve added the calendar to your favorites you should be able to view the calendar on both the Outlook desktop app and through Outlook on the web.
Outlook for MacOS
Open up the Outlook app on your Mac and with it open click Tools > Public Folders… from the menu bar along the top.

In the public folders window, navigate through and locate your organization’s public shared folder and click on it. Within it should be the shared calendar you’re looking for. Click on the calendar then click the Subscribe button in the top left of the window. Once you’ve done that you can close the Folder Browser window.

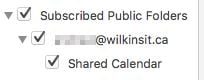
Now if you navigate to the calendar view inside Outlook you should see a new category called Subscribed Public Folders, within that should be the shared calendar you subscribed to, click to enable the checkbox beside it’s name and you should start seeing the events from that calendar in Outlook.
That’s everything, if you ever need to remove the calendar or add another one just follow this same process to do so.
Outlook on the web
Log into Outlook on the web first if you haven’t already. Once logged in, look to the menu on the left that has Folders just below the search box. If you see an item for More then click on it to get a more detailed view.

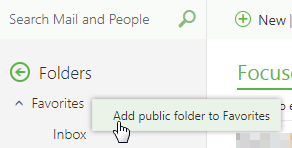
Now that you’re looking at the complete list (you should see all of your mail folders, inbox, sent items, drafts etc), right-click on Favorites then click Add public folder to Favorites.
In the new pane that opened up, open All Public Folders, then the shared folder within that location (it’s name could vary, but should be named something that indicates it is a shared folder). Within the shared folder you should see the shared calendar listed; click on it then click the Add to Favorites button at the top of the pane. if you’re prompted to name the calendar, name it whatever makes it easiest for you to identify it.

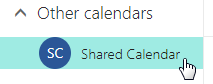
Now you can switch to the calendar view (click the Calendar button in the bottom left of the window, to the right of Mail). The calendar you added should appear under Other Calendars now. Click on it to make sure you’re able to view it without issues.
That’s everything, once you’ve added the calendar to your favorites you should be able to view the calendar on both the Outlook desktop app and through Outlook on the web.
Creating new calendars
If you have the appropriate permissions set up for your account, you may be able to create new calendar’s within the Office 365 company public folder. To create one just follow these few steps below.
Navigate to the Folders view in Outlook ( Hotkey Ctrl+6 )

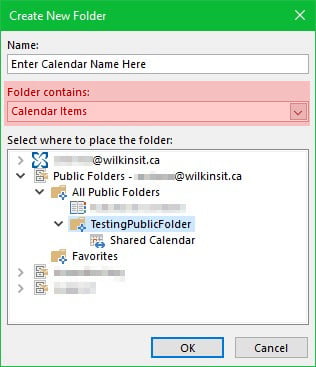
Locate the public folder for your organization that contains the calendars (you may have to scroll down in some cases). It will usually be under Public Folders > All Public Folders. You can confirm it is the correct folder if you expand it and see existing calendars within it. In the example screenshot it is called “TestingPublicFolder“.
When you’ve located it right-click on it and click New Folder… from the menu.

A new window will open – make sure the folder that contains the calendars is still highlighted, enter the name of the new calendar you’re creating in the Name: field and then make sure the Folder contains: field is set to Calendar Items. Click OK when you’re done.
When you click OK the new calendar will be created, you should see it appear in the same folder as the previous calendars. Just follow the steps above to add it to your favourites which will display it under Other calendars when viewing the calendars pane in Outlook.
That’s it, you should now have a new calendar created. You can now configure permissions so the correct people have access to the calendar across your Office 365 organization!
