If your email is hosted with us and you use an iPhone or iPad then you have the option of using a mobile config file to automatically set up and add your email account to the device. This article will cover how to configure and add the Profile using this file as well as how to remove it if you need to later.
In most cases where you’ll use this method toa dd an account we will provide you with it to simplify the process, but it is available to you directly by accessing your webmail interface inside the Configure Mail Client option under the Other Webmail Features section.
Adding a Profile
- Open the file / URL provided to be prompted to add a Profile to your phone. Tap on Allow to proceed
- You should get a confirmation that the Profile has been Downloaded
- Open your Settings app, and look for the option for Profile Downloaded then tap it
- It should show you the account you’re adding. If it’s correct then tap on Install in the top-right corner and tap Install again to confirm
- Enter the password for the account when prompted and tap Next
- If the password entered was correct you’ll see a Profile Install confirmation, tap Done to finish
- You can now access your email through the iOS Mail app


( click on an image to zoom in )
Removing a Profile
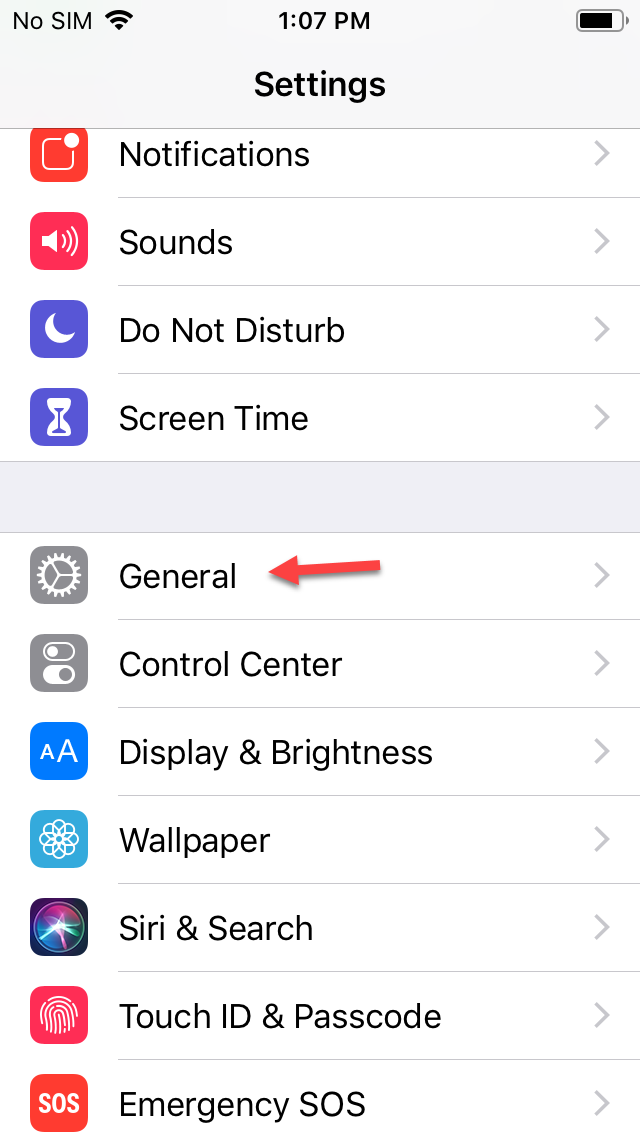
- Open the Settings app and look for General then tap into it
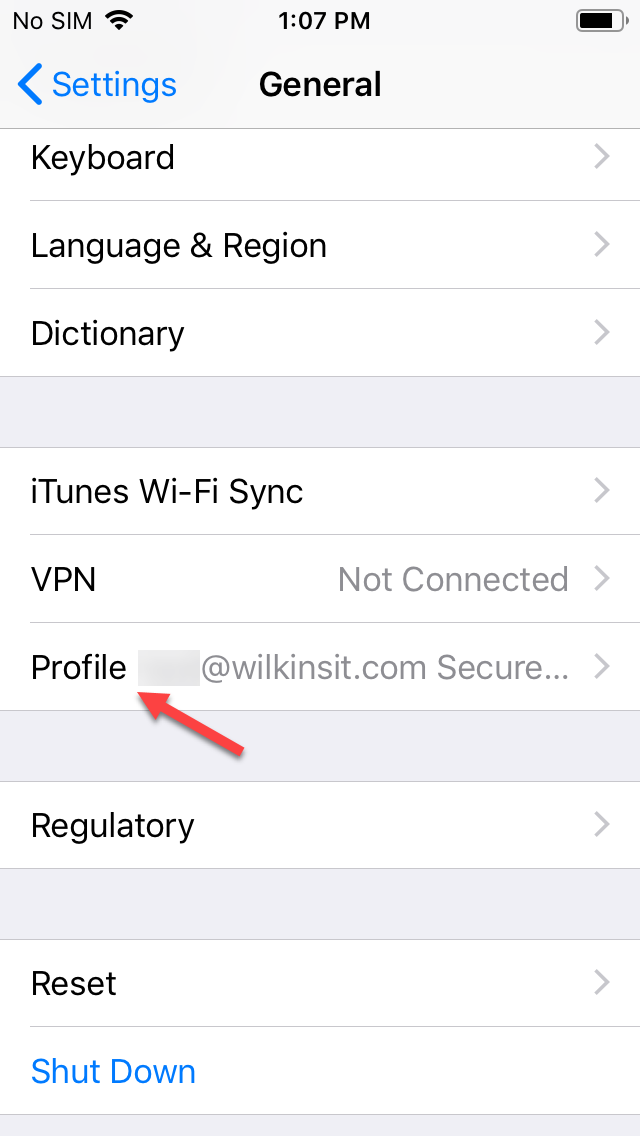
- Scroll down and look for the Profile section then tap on it
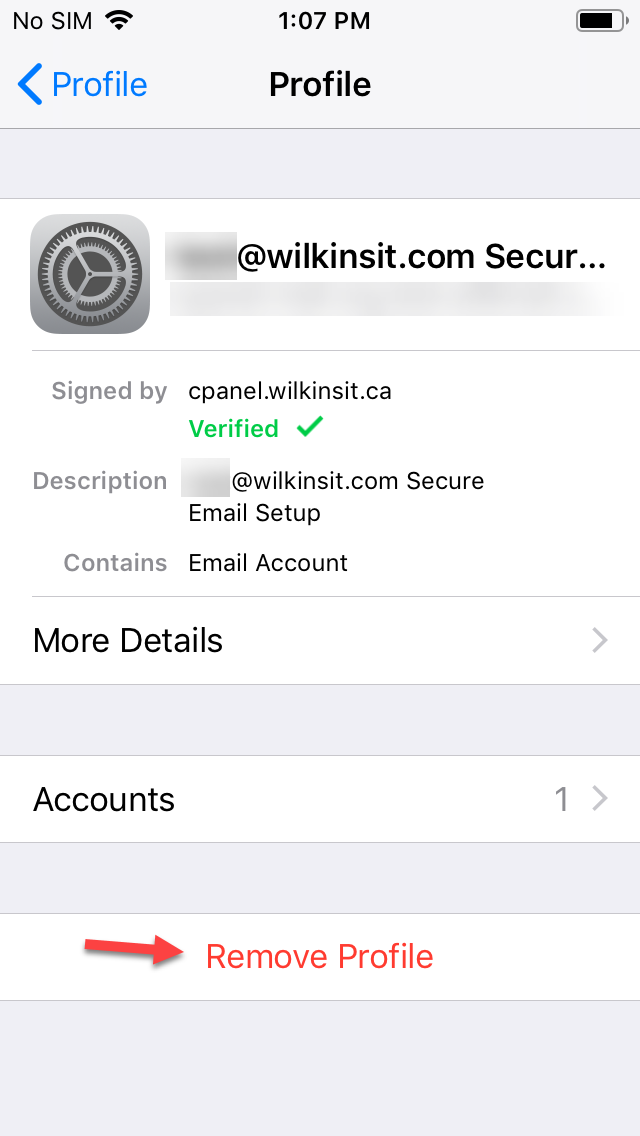
- Look for the profile you wish to remove and tap on it
- Tap the Remove Profile button, then tap Remove to confirm
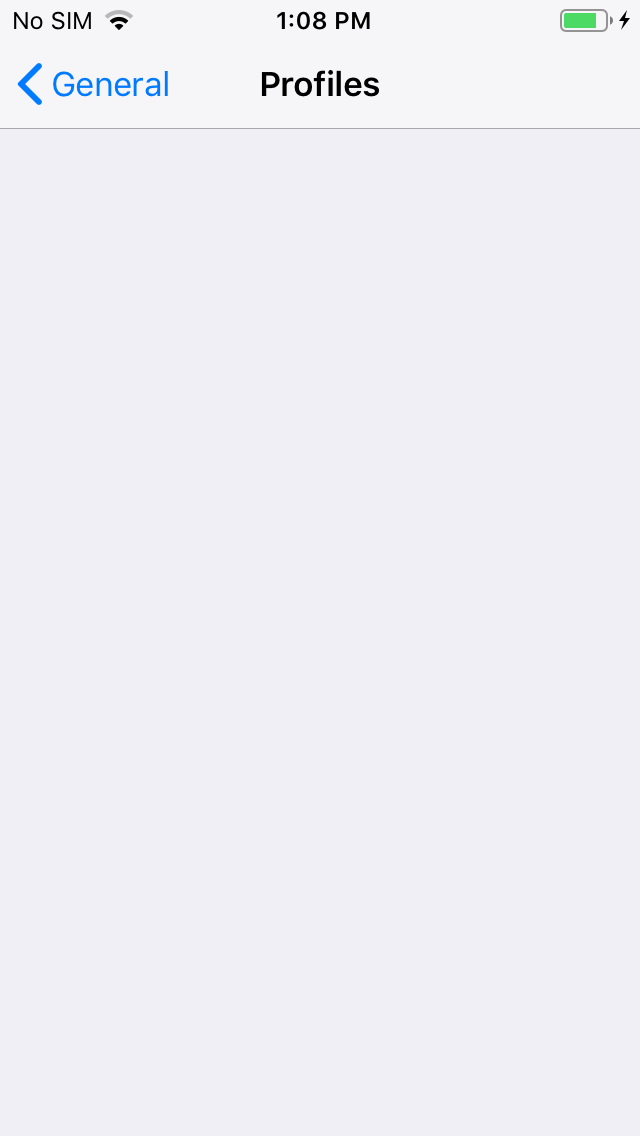
- After the profile is removed you should return to the list of Profiles, if you only had one then it will be blank. The account configured under that profile should be removed from your device now


( click on an image to zoom in )
Downloading the Profile configuration file manually
If you weren’t provided the Profile configuration file by us and you’d like to locate and download it yourself, follow these instructions.
- Login to the webmail for your domain. If you domain was example.com then your webmail should be webmail.example.com
- Once logged in, click on Webmail Home on the left-hand side of the page
- Listed under Other Webmail Features click on Configure Mail Client
- Listed under Mail Client Automatic Configuration Scripts find the section for iOS and click on the link for IMAP over SSL/TLS to download the Profile configuration file
- If you follow these instructions on your phone you can immediately run the file to configure your email, otherwise you may have to send it to your device using another method


( click on an image to zoom in )
That should cover the basics of adding and removing Profiles under iOS to use with your Wilkins IT hosted email. If we missed anything or you have any questions, don’t hesitate to contact us!
